Part 3: Implementing CI/CD in Salesforce with the Org Development Model
In this follow-up post, we’ll dive into configuring our CI/CD pipelines for the LucidSF_Integration and LucidSF_Prod orgs. Specifically, we’ll set up a GitHub Action to automate integration testing for pull requests
In our Salesforce CI/CD process, we will follow a structured workflow that helps manage development efficiently during each sprint. Here’s an overview of how our branching strategy will work:
Note: This blog post assumes you’ve already set up a GitHub repository for your Salesforce project, ideally mirroring your production environment, and completed Part 1 and Part 2
Branching Strategy
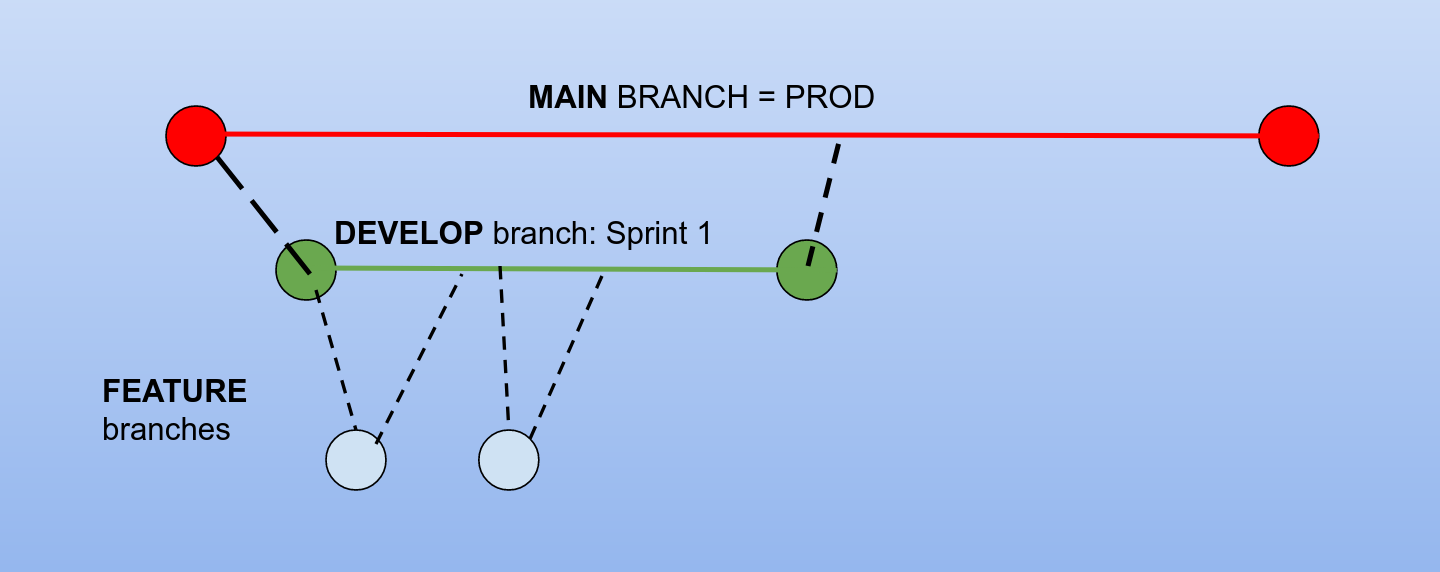 My take on the Gitlab Flow branching strategy that we shall use here
Create a ‘develop’ Branch: At the beginning of each sprint, we will create a
developbranch. This branch will serve as the integration branch for features being developed during the sprint.Feature Branches: Developers will create individual branches from the
developbranch to work on new features. For example, a developer may create a branch namedfeature/removeIsOddCheckto implement a specific feature. This approach allows developers to work independently without affecting the main codebase.Pull Requests: Once a developer has completed work on a feature, they will submit a pull request (PR) to merge their feature branch back into the
developbranch. This process initiates a code review to ensure quality and maintainability.Code Review and Merging: A senior developer or tech lead will review the pull requests. They will provide feedback, request changes if necessary, and, once approved, merge the feature branches into the
developbranch. This ensures that all code changes are vetted before integration.Merging to Main Branch: Once all features for the sprint are complete and merged into the
developbranch, the tech lead will merge thedevelopbranch into themainbranch. This final step signifies that the new features are ready for deployment to the production environment.
We will use Github Actions to automate our validation and deployment to the Integration and Production orgs.
Check out this execellent article about branching strategies on Geeks for Geeks
Preparing the Integration Pull-Request GitHub Action
Our goal is to automate testing so that any pull request made from the development branches runs against the LucidSF_Integration org. This will ensure that all new code is validated before it gets merged.
Objectives for the Pull-Request GitHub Action
In this section, we will:
- Create a pull-request YAML file: We’ll define our first GitHub Action in YAML to specify the workflow for handling pull requests.
- Define the Workflow: The YAML file should include steps to authenticate with the Salesforce org, run tests, and check for any failures.
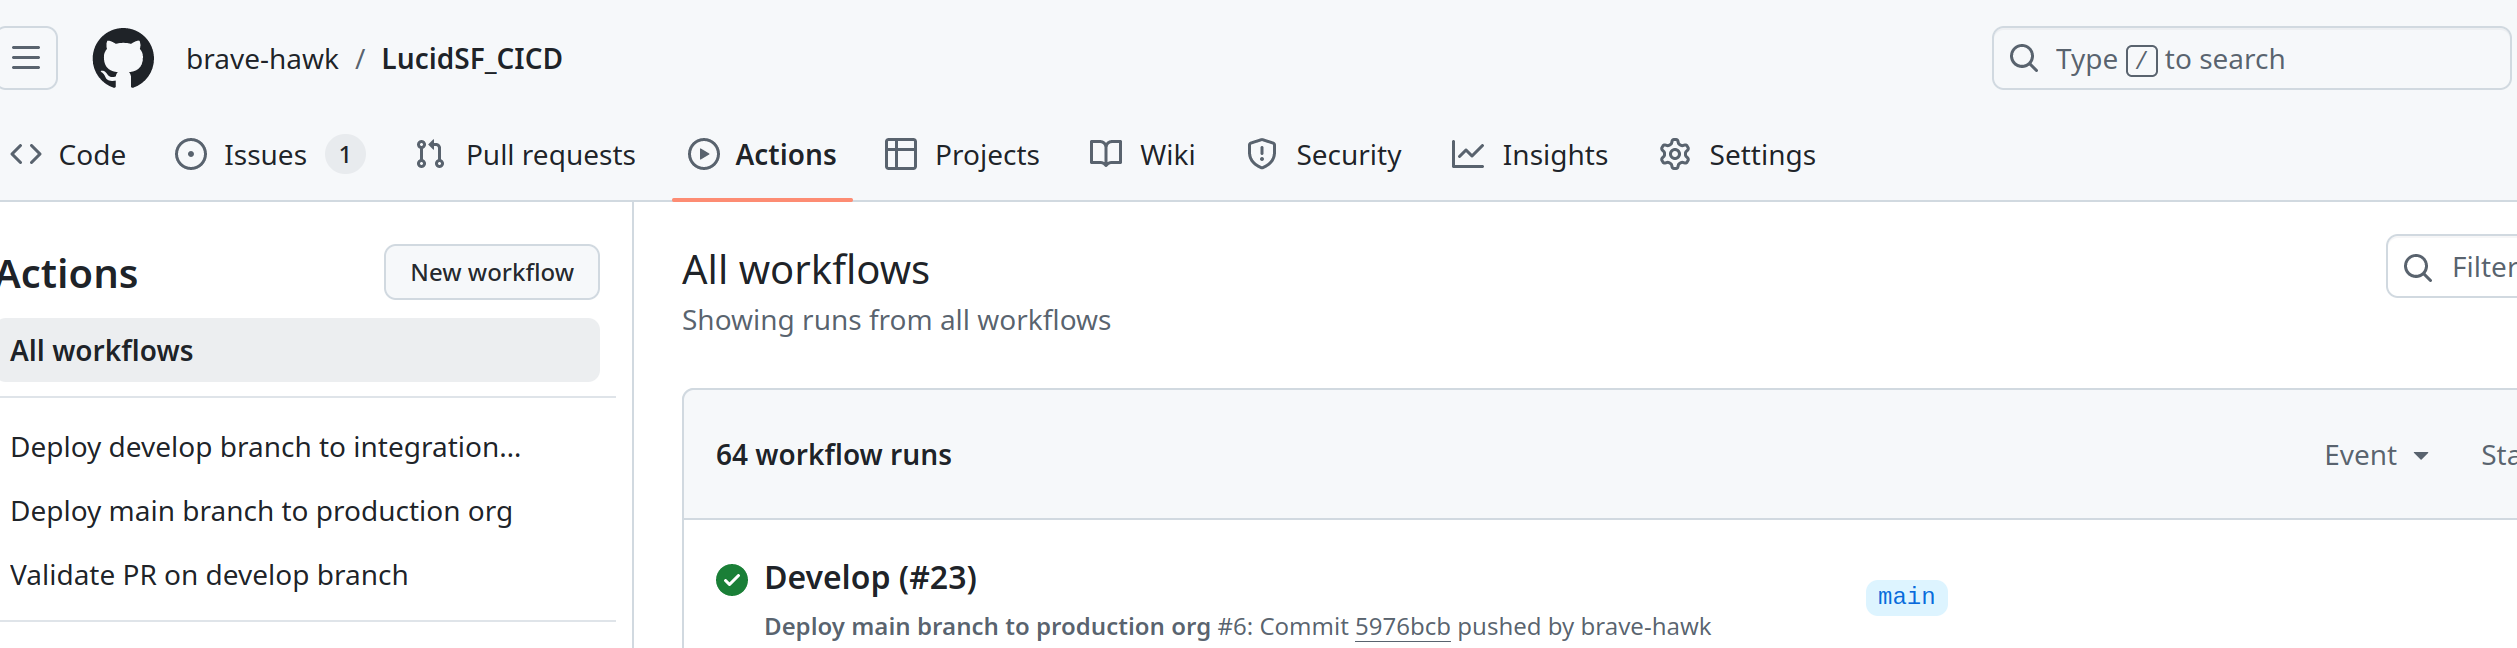 Github actions for the repo, showing three workflows configured on the left
Step 1: Create the .github Folder
First, check if a .github folder exists in the root of the repository. If it does not exist, create it.
- Open your terminal and navigate to the root of your repository.
- Create a folder named
.githubwith a subfolder calledworkflows.
Step 2: Create the pr-develop-branch.yml File
Next, create a file named pr-develop-branch.yml inside the .github/workflows directory. This file will define the workflow for pull requests targeting the develop branch.
- Create the file
pr-develop-branch.ymlin the.github/workflowsdirectory. - Open the
pr-develop-branch.ymlfile in your favorite code editor.
Step 3: Define the Workflow
Now, add the necessary configuration to the pr-develop-branch.yml file. Here’s are some important things to include:
1
2
3
4
5
6
7
8
name: Pull Request to Develop Branch

on:
  pull_request:
    branches:
      - develop
    paths:
      - "force-app/**"
The above lines define the name of our workflow, and that it should run when pull requests are made to the develop branch. Ignores other subdirectories, except what’s in the force-app folder
1
2
3
4
5
6
7
8
9
10
11
12
13
14
15
16
17
18
19
20
21
22
jobs:
  validate-deployment-on-integration-org:
    runs-on: ubuntu-latest
    steps:
      - name: Checkout Code
        uses: actions/checkout@v4
        with:
         fetch-depth: 0

      - name: "Populate auth file with SFDX_URL secret of integration org"
        shell: bash
        run: |
          echo $ > ./SFDX_INTEGRATION_URL.txt

      # Authenticate to org using the URL stored in the text file
      - name: "Authenticate to Integration Org"
        run: sf org login sfdx-url -f ./SFDX_INTEGRATION_URL.txt -s -a integration

       # If the env variable equals all, we run all tests
      - name: "Dry-run deploy delta changes - run all tests"
        run: |
          sf project deploy start --source-dir "changed-sources/force-app" --dry-run --test-level RunLocalTests -w 30
Next, we define our jobs as in the code example above. Breakdown:
- Use the ubuntu-latest image to run our actions
- Use the
checkoutgithub action with a depth of 0 to fetch only the latest commit and check it out to a working directory - Get the secrets we set up in Part 2 of this blog to authenticate against our org.
- Do a dry-run deploy against the integration org
We can add as many steps/customizations as we like, according to our org and workflow needs.
See the workflow I used for this demo project on my github repo
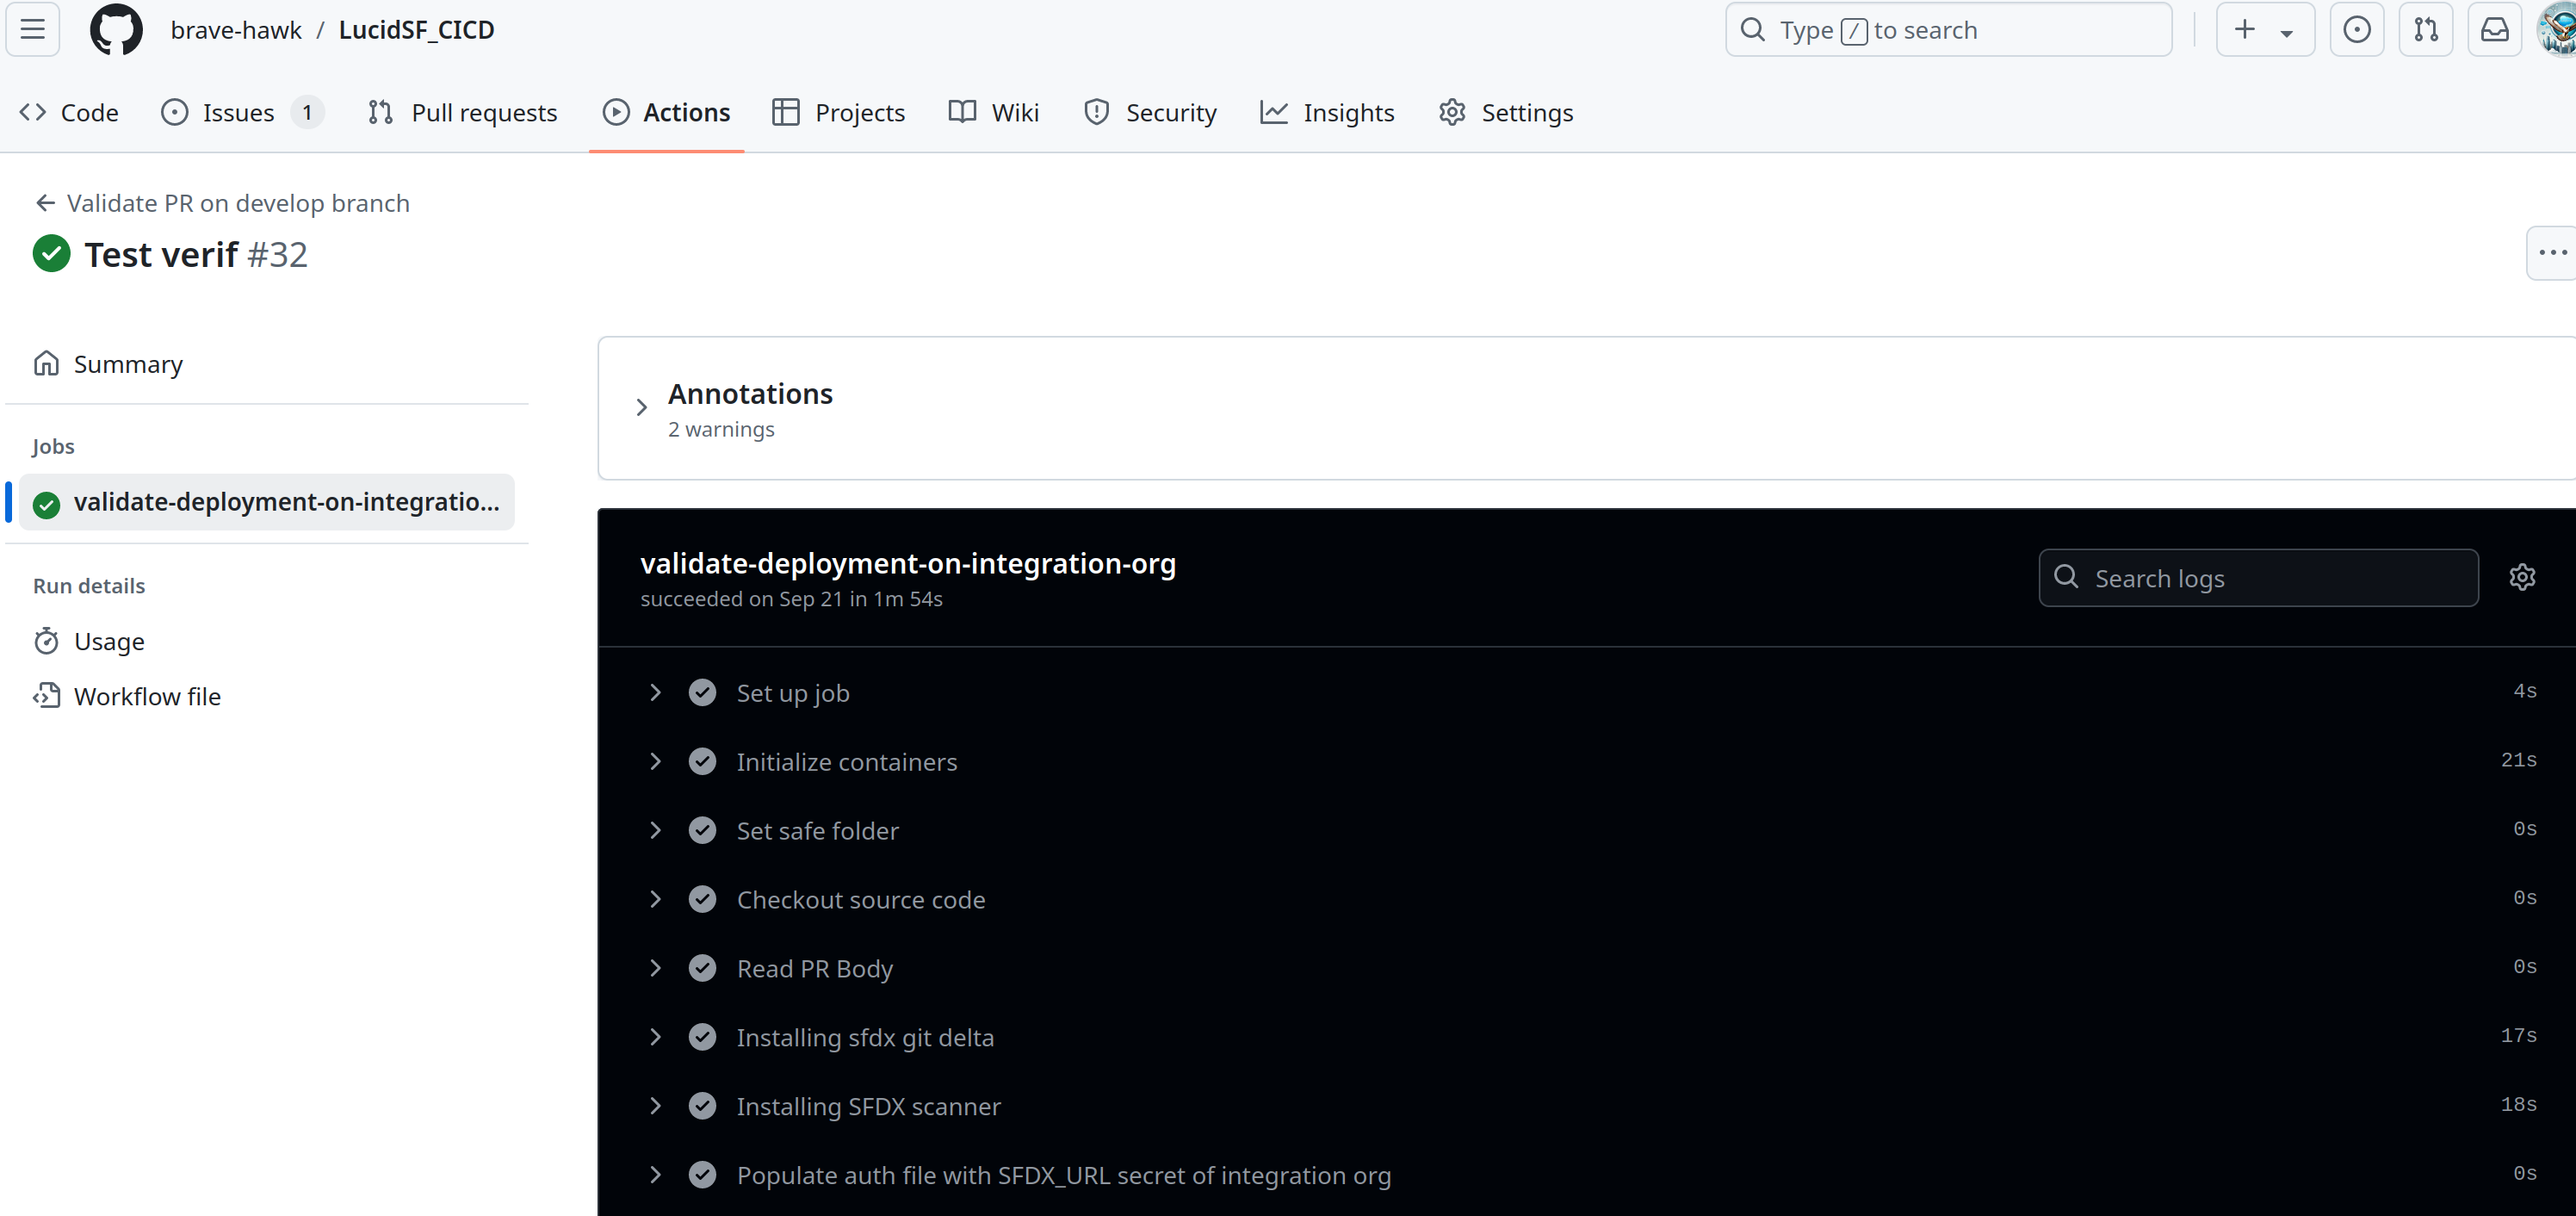 Example of the workflow in action
Deploy develop branch to integration org
If all validations in the Pull-Request action pass, and the tech lead merges the develop branch, it is now time to create the workflow to automatically deploy the changes to the integration org.
Step 1: Create the push-develop-branch.yml File
Next, create a file named push-develop-branch.yml inside the .github/workflows directory. This file will define the workflow for pull requests targeting the develop branch.
- Create the file
push-develop-branch.ymlin the.github/workflowsdirectory. - Open the
push-develop-branch.ymlfile in your favorite code editor.
Step 2: Define the Workflow
Now, add the necessary configuration to the push-develop-branch.yml file.
There are large similarities to the previous yml file we created, except for this important part:
1
2
3
- name: "Deploy the entire branch to Integration org"
        run: sf project deploy start --source-dir force-app --test-level RunLocalTests --verbose
Instead of a dry-run deploy, we actually deploy the changes. Example of the yml file I used can be found here: Deploy develop branch to integration org workflow
Deploy main branch to production org
If all test in the integration environment are satisfactory, we can now merge the develop branch into the main branch.
We would like this to trigger a deploy to the production org, so we create a workflow for it.
This is also largely the same as the previous workflow, except that we now authenticate against the production org, instead of the integration org.
YAML file can be found here: Deploy main branch to production org